Showing posts with label Howdy Kitchen. Show all posts

4.29.2013

Howdy Kitchen….Baby Showers

The first weekend in April,

I was hired to make a rainbow cake for a baby shower.
Because I was going to use a frosting technique that hadn’t used before,
I did a practice cake the weekend before, which happened to be Easter,
as well as my dad’s birthday.

Perfect timing!

The cake was 6 layers tall, in ROY G BV order. {No ‘I’.}

IMG_4630

This frosting technique took awhile, but I think it’s fabulous! 

IMG_4626

If you search around online or even Pinterest,
you will see lots of different styles and ideas for this technique.

Finally, the inside of the cake…..

906642_10151367655677055_1657071313_o

It was a Noah’s Ark themed shower, so of course the cake as rainbow,
and the frosting blue to resemble water.

But this frosting isn’t just colored blue.

It is actually blue raspberry flavored.
And is currently my favorite frosting!


Last weekend, I was hired to make cupcakes for another baby shower.
I went with the following flavors:
Wedding Cake with Blue Raspberry Frosting
Chocolate with a frosting I made up
Strawberry lemonade with a whipped cream frosting

IMG_4782 

I’m a fan of cupcake tablescapes!

So much better than picking them up out of a pan!

{Note….I did not do ANY of the displaying of the cupcakes or the work to set it up.
I just made the cupcakes, and shared some of the items
around my home to help pull it together.}

IMG_4777

After making all of these….I must admit that my current favorite cupcake is:

Wedding Cake with Blue Raspberry Frosting.


Up next for the Howdy Kitchen…..

Making a couple hundred {likely more} mini cupcakes for a graduation party.


What flavor of cupcake would you want to enjoy a graduation party?

12.19.2012

Peppermint Brownies

Here's a quick and easy {altered} brownie recipe.

I made these for connection group, and then shared them at work as well.

If you love peppermint and chocolate {like me!},
these will be a big hit!

Even though they were a gooey mess, everyone seemed to enjoy them!


peppermint brownies


Peppermint Brownies

{I used a jelly roll pan for these…so doubled the recipe}

1 box fudge brownie mix
mini chocolate chips
mint of your choice:  Andes mints, York Peppermint Patties, crushed candy canes, etc.

Make and bake the brownies as directed on the box,
but add in some additional chocolate chips.

As the brownies are cooling, prepare the frosting.
1 tub of white frosting
Peppermint flavor
Food coloring {red or green}
Toppings of your choice

When I make these next time,
I believe I will use crushed candy in the brownies themselves,
in addition to adding some to the frosting
and on top of the frosting to finish off the look.


A quick and easy recipe to add some great taste
and fun color to your holiday plate of treats.

5.21.2012

Cupcake Crush

I have some serious lack-of-blogging trouble going on!
Sorry about that!  

I guess I am just living life, and forgetting to share about it.  
And I know Gina doesn't like that.  

So for you sister, I am going to do my best to recap some of the things
that have happened that you wanted to see pictures.

But that will start later. 
Today, it's about cupcakes {and resumes}, since that was my life last week.


{Strawberry Wine...regular and mini size}

 A couple few weeks ago, Mama Peacock and I did a little bartering.
I'd do some baking for her in exchange for some jewelry for me!

That's my kind of barter!

 So last week, I got to baking.  I started the baking on Tuesday evening.

I made a batch of strawberry wine cupcakes. 
Because of the frosting I like to use, I did not frost them yet.

I then ended the night reading a couple resume's for work.

Wednesday I made red velvet.  No picture there.
I did NOT want to get red food coloring on anything.  

Just know, they are from scratch and delicious!

Of course, I ended the evening reading a couple more resumes again.

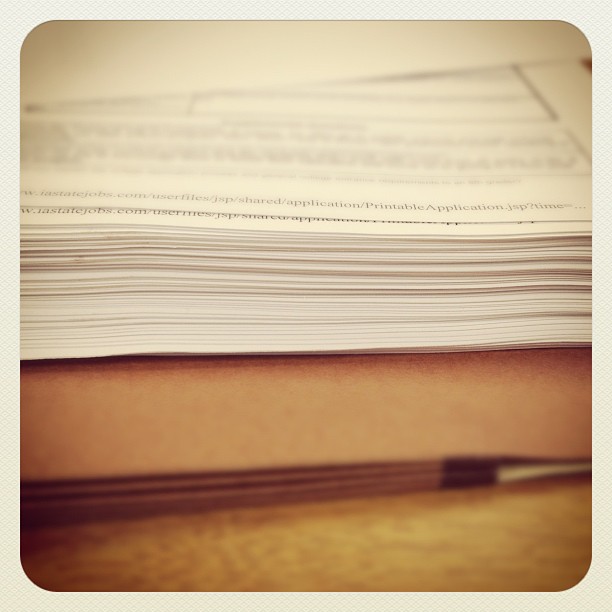
{Stack of resumes/applications!}


Thursday night, I decided to frost the strawberry wine cupcakes.  
The frosting is a fun lime/mint green color, topped with fun sprinkles.

Then, of course, I got back to the resumes.

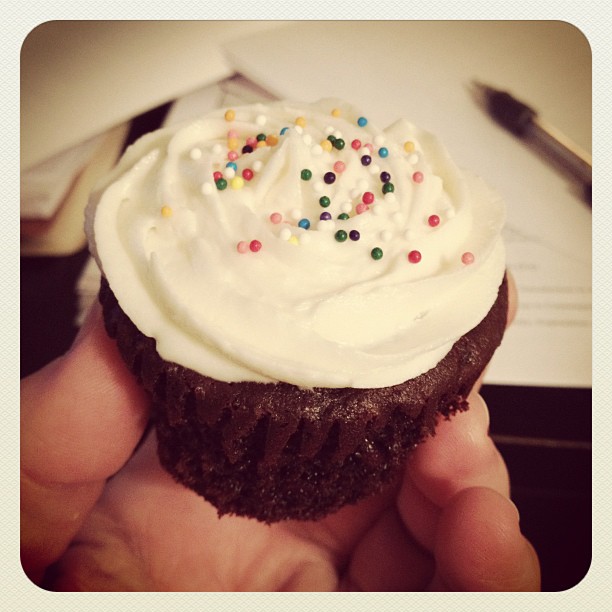
{Cupcakes & Resumes}


At some point, Thursday night, I made up a batch of doctored up devils food cupcakes,
with cream cheese frosting.
I really don't remember if I made them to make them, or who they were for!  Jeesh.

But, at some point well after midnight, I enjoyed a little snack while reading resumes.

:)


{Doctored Up Devil's Food}


Maybe I had extra regular sized cupcakes from making a bunch of mini ones.
I can't remember.  Man, where is my mind going?

{Update:  3 hours later I remember....
I made them for the Search Committe meeting on Friday at work!}

To the cupcakes, obviously!

These little guys were for Mama Peacock & family's going away party Sunday evening.


 These little cuties were for the party as well. 
They are strawberry lemonade cupcakes, with lemonade frosting.


Due to some of my recent pictures I've posted on Facebook, I was asked if I take orders.
Sure?  

I usually just make cupcakes because I enjoy it, and I enjoy eating them.  :)

But I'm happy to make them for people as well!

With that, I added a new tap at the top of my page.

It is titled 'Cupcake Crush'.

I have listed some of the cupcakes I've made, as well as others that interest me.
I'm pretty sure that all the ones I have made aren't on the list.
I don't always remember what I do when I doctor up a recipe.

In July, I get the pleasure of making a bunch of cupcakes
for some friends' wedding reception!


If you have any fun/favorite cupcake recipes, please share!

I always like new and fun ideas.


Happy Baking/Eating!


3.30.2012

Cupcakepalooza!

A few weeks ago I signed up to get in the running to host a House Party for

Duncan Hines
Frosting Creations House Party.

 Believe it or not...I was selected!

  Then, the waiting began.

A couple weeks ago, I received a fun package in the mail.


Wahoo!

Now, for the goodies inside....


Let me sum it up:
* 8 Duncan Hines Frosting Creations starter frosting cans
* 12 Duncan Hines Frosting Creations flavor mixes
* 4 Duncan Hines coupons to purchase cakes, cupcakes, brownie mixes
* 1 Duncan Hines Apron
* 1 Duncan Hines Frosting Creations recipe book
* 15  coupons for Duncan Hines Frosting Creations to share with guests


Then...I had to wait again.

Until tonight!

I finally get to try out the different frosting creations.
And I'm a little excited about it.
I picked up 3 cake mixes and 1 brownie mix with the free coupons I was sent.


Too bad I haven't gotten any of the cupcakes or brownie bites made yet!

Oh well, that's all part of the fun, right?

I'll take pictures of the creations.

To help with the creating, I plan on using some plastic piping bags.

Yes, I know I could use ziploc bags...but I have the disposable piping bags,
so that's what I'm going to do.

Plus, they will have more stability than the ziploc bags.
And sometimes that is important if people haven't piped much.

Have you tried any of the Duncan Hines frosting creations yet?

I have seen them in my local grocery store, but haven't let myself try them until the party!

It just seems a little more fun that way.  :)


2.27.2012

Howdy Kitchen: Grilled .... & Cheese Love!

Tonight, while making supper, I realized I have been on a
Grilled {insert a food item} and Cheese sandwiches lately.

Last weekend while at my sister's, I made Grilled Turkey, Spinach, and Cheese.

A couple times this past week, I made Grilled Tuna and Cheese.

Tonight, I made Grilled Sloppy Jill's and Cheese.


I have also hand Grilled Cheeseburgers.

What other type of Grilled {something} and Cheese am I missing out on?

Please share!

2.06.2012

Howdy Kitchen: Potatoes!


During one of my recent trips to Sam's Club,
I came across a new find that I have fallen in love with!

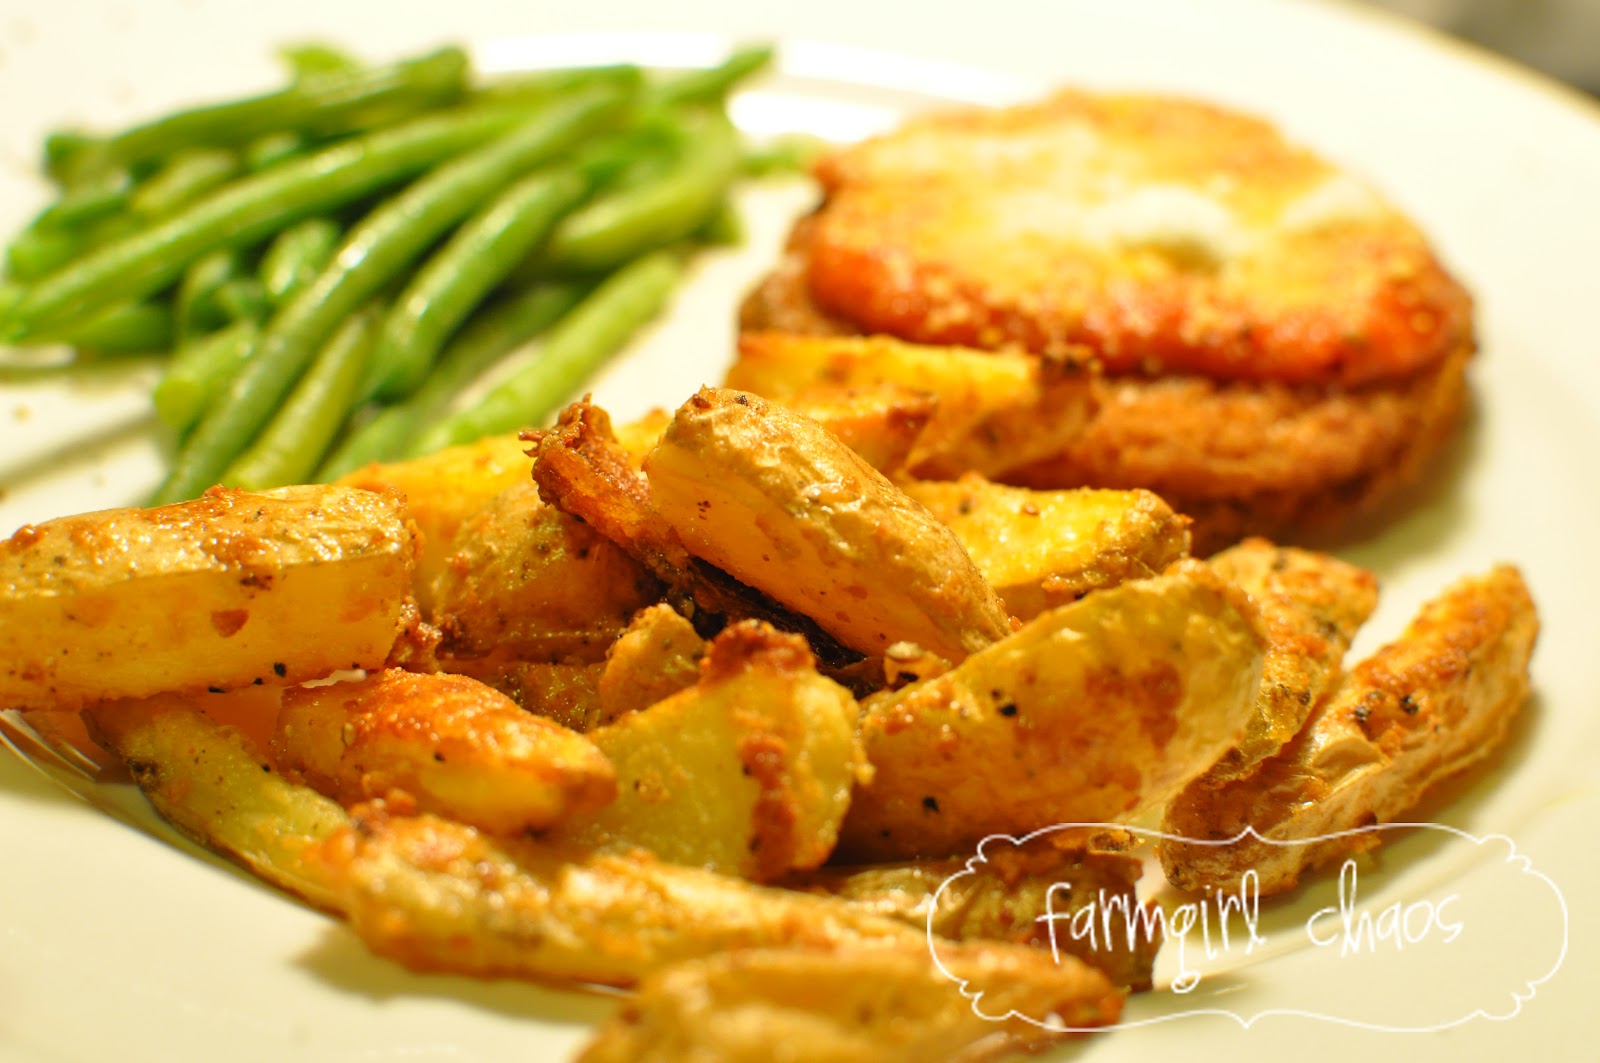
Steakhouse Roasters Fingerling Potatoes

{I need to go back and get more....I still hope there are some there!}


Aren't they cute??


Anyway, I have a 'staple' way that I like to make my potatoes.

Whether they are little red potatoes {which are my usual go to},
or these little guys.


After I clean them up, I will cut them down in size.
Little red potatoes I usually cube.

But for these fingerling potatoes, made them steak fry size.


I put them in a bowl, and tossed them with some olive oil.


Then I pulled out my go to seasonings.
Sea Salt
Black Pepper
Lawry's Seasoning Salt
Garlic {I didn't have any real garlic on hand, so went with the powder form}
Parmesan Cheese!


After I seasoned them all up, I put them on a stone,
threw them in a 350 degree oven,
and let them roast.

I did stir them around a couple of times for even baking.

I believe I roasted these potatoes for at least 45 minutes.

In the end, they were awesome!

Crunchy on the outside....a little chewy on the inside.

YUM!

Just look at the crunch texture!


I have made these potatoes numerous times,
and people always seem to love them...
when I actually share them!

They are a great, tasty, and easy recipe!


On a side note:  Do you see what's behind the potatoes to the right?

For a quick meal, I like to add some marinara/spaghetti sauce and
parmesan cheese to chicken patties.
Usually I like to have pasta on the side for chicken parmesan.
But this night, it was all about the potatoes!

:)


2.01.2012

Howdy Kitchen: Tacos!

I have a confession to make.....

I think I am a closet Mexican.
:)


I kind of like Mexican food.A.LOT!

But one meal I always look forward to is.....

TACO NIGHT!


These taco shells aren't your typical shells out of a box.

We do it up right....corn tortilla style!

And by 'we', I mean one of my favorite local families and I.
Because I usually invite myself over for taco night.
Or I tell them it's taco night when I'm wanting some tacos.
Of course, they love tacos too.  :)

I encourage you to try taco night this way just once, and you will be hooked.


-Get yourself some corn tortillas.
{Believe it or not, we usually get ours at Dollar General.  
They seem to have the best/softest corn tortillas.}

-Heat up your choice of oil in a big pan/skillet on medium heat.
{Don't be afraid to use plenty of oil!}

-After a few minutes, place a tortilla in the oil to see if it's hot enough. 
If it starts sizzing right away, you are ready to fry them up!

 -Fry the shells.  This is where preference comes in:
Soft shells...fry the tortilla on both sides until they start to bubble
and get a light color on them.
Fold the tortilla in half.
Fry until they get to the light crunch that you want.

Crunchy shells...the way that I make them!....
fry the tortilla on both sides until they get a little darker color.
As they are browning, see how they fold to make sure they aren't getting to crunchy
and break in half when you fold it.
Once they get to a nice crunchy state, fold the tortilla and half,
and fry some more on each side.

-Once the shells are to the level of crunch that you like,
place them on a paper towel lined pan/dish/plate to drain off some of the oil.

-Fill the shell with your favorite things.
Lately for me, this is what I've stuffed in my taco shell:
chopped spinach
ground/browned turkey or hamburger
sour cream
salsa
fresh grated cheddar cheese

YUM!


Sorry I didn't get a picture of a filled shell.
I was more worried about eating the tacos than taking a picture.


And apparently when my 'family' had taco night a few weeks back without me,
the littles asked where Coleigh was!
I like that they associate taco night with me.  :)


So yes, I am a closet Mexican.  
Plus, this farmgirl just enjoyed Mexican food 3 days in a row!
Sunday:  Chicken quesadilla & rice at a Mexican restaurant in town.
Monday:  Taco night with my 'family'.
Tuesday:  Crunchy buritto from Taco Bell after my school visit today.


I guess I am the pro shell maker as well. 
I have been the designated taco shell maker for the past few years,
whenever tacos are on the menu. 
I sure wish more Mexican restaurants would fry up their taco shells like this!


So, who wants to come over for tacos?

:)

1.26.2012

Howdy Kitchen: Hawaiian Crockpot Chicken

Thanks to Pinterest...I now have a fabulous and easy meal

Hawaiian Crockpot Chicken!


 The Pinterest link can be found here....Hawaiian Crockpot Chicken.

However, for some reason, the direct blog link does not work.


Hawaiian Crockpot Chicken:
4-6 chicken breasts
Hawaiian style barbecue sauce {or whatever you have on hand)
Can of crushed pineapple
Put in a crockpot on low for at least 6 hours


When I made this, I had some King's Hawaiian Dinner Rolls on hand.
So I made myself some little Hawaiian Chicken Sliders.

I think my friend Amy had her's eaten before I even sat down.  :)

This morning, I received an 'emergency/911' call and then text from my coworker.
She wanted to make this, but couldn't remember if there was to be water added or not.
NOPE!  The barbecue sauce and juice from the crushed pineapple will be enough.

If you want, you could probably leave the chicken whole, and maybe even add a slice of swiss cheese to the chicken, and then throw it in the oven for a few minutes.
But I chose to shred mine, then added some more of the 'juices' from the crockpot.

It was sweet, but full of flavor.
What other great and few ingredient crockpot meals do you have?


I am pretty certain that I will be making this again soon!  

YUM!

1.17.2012

Howdy Kitchen: Peanut Butter Caramel Dip

Thanks to seeing a post at The Kitchen Tutor, I was inspired.  

I have made the typical cream cheese fruit dip many times before. 
It's a great 'go to' dip for fruit....or even pretzels! 
{I love sweet and salty!}

Because I'm weird and sometimes have texture problems with food,
I thought I'd leave out the peanuts from the dip, but add something else.....

PEANUT BUTTER!


Oh my, was it a great thing to do! 

Here's a rough idea of the recipe I used.

1 8oz block softened cream cheese
1 cup brown sugar
vanilla {to your liking}
1 cup peanut butter
milk


I first mixed the cream cheese, brown sugar, and vanilla together until smooth.
{I hardly measure vanilla...is just pour it in.}  :)

I then added in about 1 cup of peanut butter.  Maybe less, maybe more.
{Again, I didn't measure...just did it.}

Mix it all up.  At this point, it will likely get very thick and sticky.

Now is when you start adding a few pours of milk, then mix.

Keep mixing and adding milk until you get to the texture/consistency you like.
Not too thick, but not runny.


I can guarantee you this...
I WILL be making this dip again.  Hopefully soon!

I didn't even dip any fruit in the dip this time.  Just pretzels.
Oh, I did spread some on cinnamon bread and warmed it up in the microwave  :)

Delicious!


12.16.2011

Howdy Kitchen: Gingerbread Cheesecake


At Christmastime, my love for mint grows about 100 times.  :)

I have made a few various mint-type cheesecakes.  And any that I have eaten, I have loved!

This year, after talking to a recipient of one of my free cheesecakes,
we decided to go with another traditional flavor for the holidays....

GINGERBREAD!

I haven't made a gingerbread cheesecake before, so was a excited about making this.

One ingredient I knew I would need....molasses. 

Since I wasn't sure about the other spices, I searched online and ended up with

Martha Stewart's Gingerbread Cheesecake recipe

as my inspiration for the recipe.


But, because I am me, I did change it up a bit...but not much.

I actually made 2, with 2 different crusts.

The first crust, I crushed up Keebler Gingerbread cookies.
The second, the remnants crushed up from the gingersnap cookies I made for the mini gingerbread cheesecakes.


Filling Ingredients:

4 8ox blocks of cream cheese, softened to room temperature
 1 1/2 cups sugar
4 oz sour cream
4 large eggs, room temperature
2 tsp vanilla
1/2 cup molasses
{I started with 1/4 of a cup, but it just wasn't enough for me.  So, if you aren't afraid, take a quick taste sample to see if you want to add more or not.}
1 1/2+ tsp ground ginger
1+ tsp ground cinnamon
1+ tsp nutmeg
1/4 tsp ground cloves


Directions:

1.
  Preheat oven to 350 degrees, or whatever temp you have learned is best to bake your cheesecake.  I bake mine at about 315-325.  A lower temp, but for a few more minutes.
2.
Make crust.
I mixed about 2 cups of crushed cookies with at least 4 Tbsp of melted butter.
If it isn't moist enough to form the crust, just add more melted butter.
3.
Beat cream cheese with a mixer on medium speed until fluffy, about 3 minutes. Beat in sugar, vanilla, and sour cream, scraping down sides of bowl as needed. Reduce speed to low. Add eggs, 1 at a time, beating well after each addition and scraping sides of bowl as needed. Beat in molasses and spices. Pour filling into crust.
4.
Bake until cheesecake is set but still slightly wobbly in center, 60 to 65 minutes.
After removing from the oven, run a knife or spring form pan tool around edges of cheesecake to loosen the filling from the edges.
Let it cool on a wire rack. Refrigerate, uncovered, for at least 8 hours (preferably overnight).


Topping Idea:

Put a dollop of Cool Whip on each slice of cheesecake, topped off with a cinnamon red hot.
{For some reason, I think of little gingerbread people having red hots on them as buttons or something.}

Or better yet, make your own whipped cream!
I'm thinking even cinnamon whipped cream could be good.

Check out a chocolate whipped cream recipe I made and alter it to your liking,

Whipped Cream Topping:
1 cup heavy whipping cream
1/4 cup powdered sugar
1 teaspoon vanilla
1 teaspoon honey
Add all ingredients into a large {chilled} bowl and whip until stiff peaks form. 
Refrigerate any leftovers.


To make the mini cheesecakes, I used a Norpro 3919 Mini Cheesecake Pan that I ordered from Amazon back in May.  I haven't used this pan up until now, and hadn't even opened the packing up.  I knew I didn't want to lose the little bottoms of the pan.
But wouldn't you know, when I opened it up and unwrapped those little round things, 2 were missing! 
Now to see if I can get replacements for them. 

But that pan is pretty sweet!  I need to keep playing with it, to figure out how long to make the cheesecakes.  But everyone seemed to enjoy them today when I took them on my school visit {there were rave reviews from the counselors and secretaries}.

  :)


Enjoy!


11.17.2011

Howdy Kitchen: Pumpkin Coffee Cake

{Recipe found at Tasty Kitchen, from Heather's Dish}

Yup.  This stuff is as good as it sounds!


And it is as good as it looks, too!

I followed this recipe pretty accurately....until it came to the topping.

Here's the recipe....with my little change.

Ingredients for Batter

  • ⅓ cups Water
  • 1 can Pureed Pumpkin (15 Oz)
  • 2 whole Eggs
  • 1 Tablespoon Vanilla Extract
  • 2 teaspoons Pumpkin Pie Spice
  • 1 box Yellow Cake Mix (18 Ounce Box)
  • 1 teaspoon Baking Soda

    Ingredients for Topping

  • ½ cup Brown Sugar
  • ½ cup Flour
  • 4 Tablespoons Butter, Melted
  • ¼ cup butterscotch chips
  • ¼ cup toffee or bits of brickle

    Ingredients for Glaze

  • ¼ cups Granulated Sugar
  • 1 teaspoon Vanilla Extract
  • ¼ cups Heavy Whipping Cream

Preparation Instructions

Preheat the oven to 350F.
In a large bowl mix together the water, pumpkin, eggs,
1 Tablespoon of vanilla, and pumpkin pie spice until well combined.
Add the cake mix and baking soda and mix until just combined.

Grease a 9×13 pan with butter and pour batter into pan.

In a small bowl mix together 1/2 cup of brown sugar, 1/2 cup flour,
butterscotch chips, toffee/bits of brickle, and melted butter.
Use fingers to sprinkle over the top of the cake.
Bake at 350 for 25-30 minutes, or until a toothpick inserted comes out clean.

For the glaze, combine 1/2 cup brown sugar, granulated sugar, 1 teaspoon vanilla, and heavy cream in a saucepan and bring to a simmer.
Remove from heat and stir until all sugar is dissolved.
When cake is finished baking, poke holes in the top with a toothpick.
Pour glaze over the cake, making sure to cover all surfaces.
Serve cake warm or at room temperature.


I actually made 2 of these tonight.  1 for the weekend, and 1 to take to and share at work.


Enjoy!  And happy baking. 

11.08.2011

Howdy Kitchen: Pumpkin Pie Dip

This was originally posted over at The Project Girl
Put I thought I'd share it here as well.


Pumpkin bread.  Pumpkin cheesecake.  Pumpkin muffins.
Pumpkin cookies.  Pumpkin pie.  Pumpkin fudge.

Pumpkin....I can't get enough of it!

In case you haven't figured it out, I LOVE pumpkin!  :)

Thanks to my good friend Pinterest, I came across a delicious
pumpkin pie dip that will NOT disappoint!

But first, let's think about presentation.

{I need to give props to Mindy of Best Energies Best Affections for the idea.  Thanks Mindy!}

Maybe it's just me, but I do enjoy food presentation.

I'd much rather eat/serve chips out of a bowl, instead of a bag.
I'd much rather eat/serve caramel, dips,  salsas, etc out of bowls,
instead of the containers they came in.

So, when I wanted to put together a little treat platter to share at work,
I wanted it to look nice.

1. To start off, you need fun bowls!

While in San Francisco for a work training, I got to shop at Anthropologie!
{There isn't a store located in Iowa.  Sad, I know!}

Because I can't afford the clothing, I went and looked at the House & Home items,
because that stuff rocks!

In the end, here's what I came home with.


Aren't they awesome?!  {I now wish I would have gotten more!}

2.  Next, get some sort of big platter, tray, etc.  Thanks to Mindy and her grand idea,
I used a vintage round cake pan.

This isn't just any cake pan.  I found it my Grandma's attic.
So it does have some meaning behind it.

3.  Decide what you want to put in the bowls for dips and dippers.


I decided to go with honey wheat pretzels, honey graham crackers, and grapes.
I would have used apples as well....if I had some on hand.

I served honey crisp apples with this during a craft day, and the ladies loved it!

4.  Now for the dip!


Pumpkin Pie Dip
{Original recipe found here.}

My version of the recipe....

Ingredients:
1 (8-ounce) package cream cheese, softened
2.5 cups powdered sugar
1 (15-ounce) can pumpkin pie filling
1+ teaspoon ground cinnamon
1+ teaspoon pumpkin pie spice
1+ teaspoon vanilla

Preparation:
Beat cream cheese and sugar at medium speed with an electric mixer until smooth.
Add pie filling, cinnamon, pumpkin pie spice, and vanilla, beating well.
Cover and chill.
Serve with favorite dippers!

5.  Enjoy!

It not only tastes delicious, it looks great as well!


Another fun idea would be to use clear/white/solid colored bowls,
and add the fun to the pan itself.
Just line it with some scraps of material, scrapbook papers,
or one of your favorite cloth napkins.

Obviously, I didn't think about that ahead of time.  But I will next time!
I just wanted to use my new bowls!  :)

This idea originated from Mindy as a veggie tray.
She had assorted veggies in different bowls, with a Ball jar of dip in the middle.

With the holiday season upon us, have fun with your treat/snack/dessert/drink presentation.

Don't be afraid to think outside the box!  You very well could be the hit of the party!

11.02.2011

Howdy Kitchen: Pumpkin Pie Dip

I am going to be mean to you all......  :)

Here's a peak at a post I have schedule for Friday over at The Project Girl.


Until then, you can drool over the picture.

You are welcome!  :)

10.31.2011

Howdy Kitchen: Grilled Cheese Sloppy Jill's

It feels like it has been such a long time since I have actually made real food at my place.  

Reason #1....working a lot at the Orchard.
Reason #2....being out of town or out of state for work.
Reason #3....fighting being sick for almost 2 weeks now.  {When one is sick...food is just not enjoyable.}

Anyway, I ventured out to the Orchard to drive the hayride tractor on Sunday {after going home before driving on Saturday}.  As a tractor driver, we don't get breaks.  And the awesome people in the Feed Bunk usually bring food to us.

Yesterday, they did not disappoint.  The food I enjoyed.....a grilled cheese burger.  A grilled cheese sandwich with a hamburger patty in the middle of it.  And it was DELICIOUS!  I knew that this was going to be a food item that I had remake.


Then last night I saw this pin on Pinterest, and knew I had to make it for supper tonight.


So after venturing out to get round #2 of drugs from the pharmacy, I stopped by the grocery store on my way home.  I needed to get more beef and my favorite bbq sauce....Countryside Bar-B-Q Sauce.

Note about Countryside Bar-B-Q Sauce...
this stuff is made in Algona, IA.

But sometimes it is hard to find!
Typically I find it in Fareway.

 This sauce is more sweet than typical sauces, and I love it.
I use it solely for my sloppy Jill's, and always get compliments on them.

Sometimes, I hate to share my secret!  But, I need to help promote a local product!  :)


Anyway, I browned up 2 lbs of ground beef {saving 1 lb for making goulash later}, and got to 'grilling'.


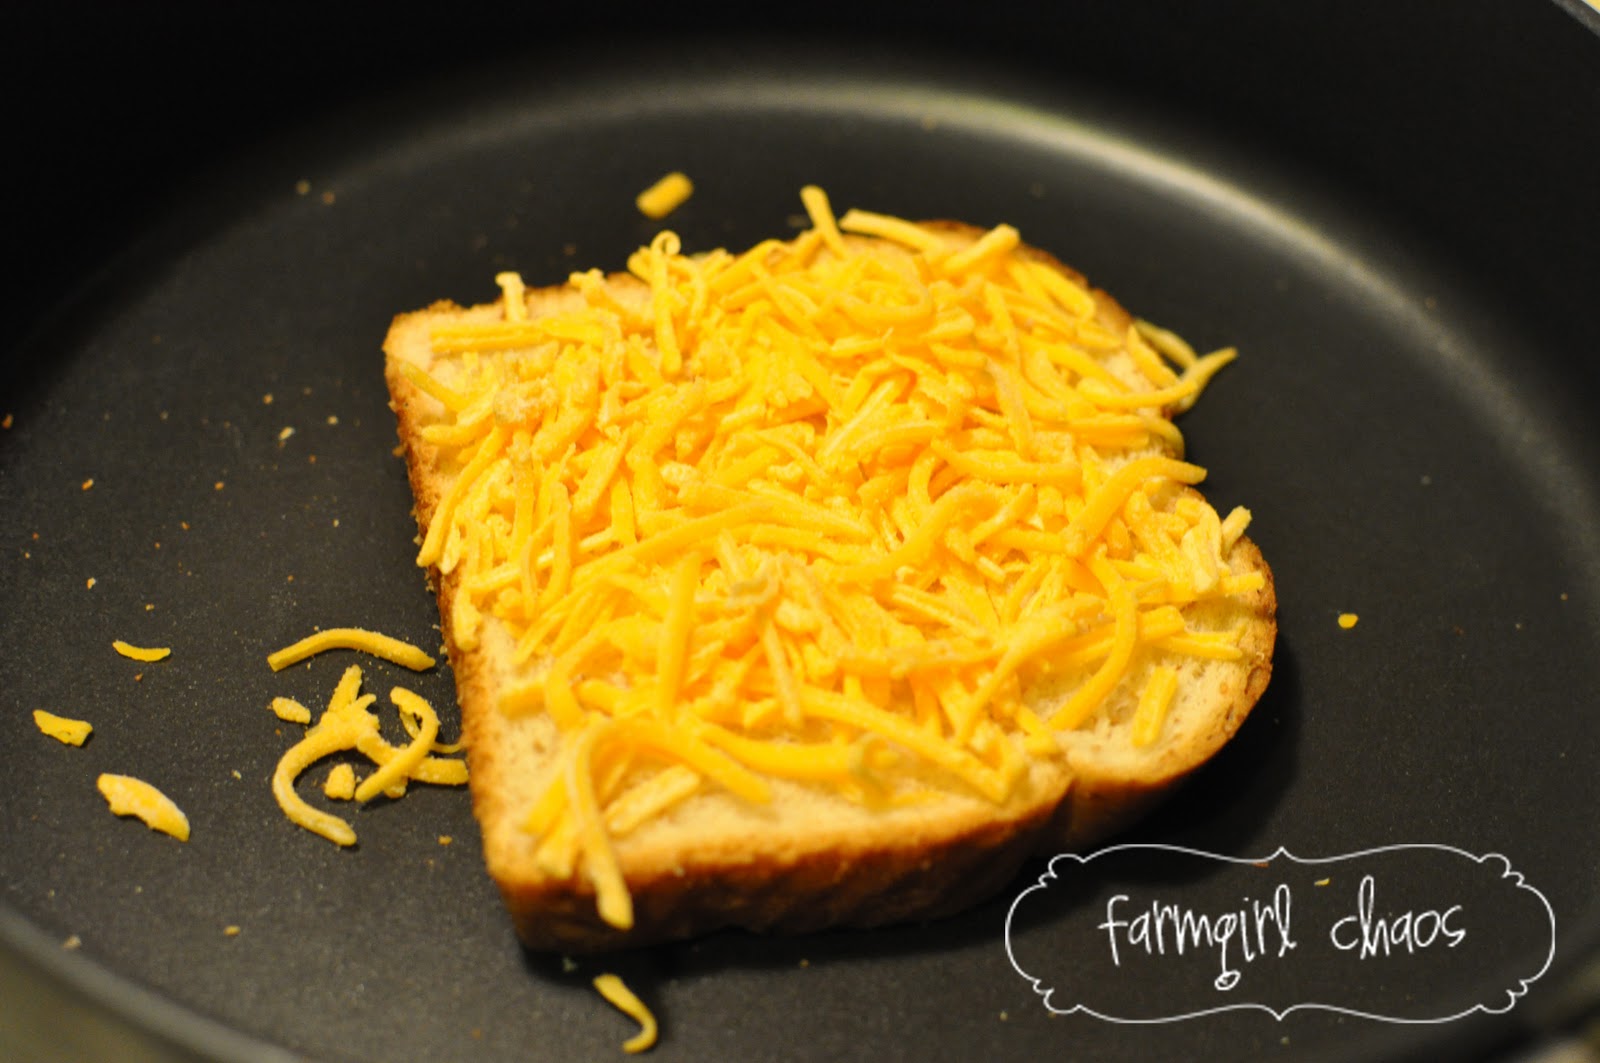
Throw one slice of bread {buttered side down} in a pan/skillet.
Then put a good handful of cheese on there. 
{Or, just use some cheese slices.}


Place a healthy serving of the sloppy Jill meat on next.


Top it with more cheese.


Then throw on a few potato chips!  :)


Finally, top it with the other slice of butter bread....butter sided up.

Flip when the bottom side looks nicely toasted.


See all those pieces of cheese?  Yup.  I ate them.  They were crispy and yummy!


Add a few more potato chips on the side, and you have a tasty {but not to healthy} meal.


So, for not having made 'real food' {besides baking cupcakes} for a few weeks, this was a great sandwich to fix that problem.


:)

9.23.2011

At the Farm! Friday....Howdy Kitchen Style

Awhile back I saw The Pioneer Woman post a delicious looking recipe for


From the abundance of apples a few weeks back,
I knew they would be perfect for this recipe.


Farm fresh apples are the best!
Just too bad I didn't have farm fresh pork chops.
{But these were still delicious!}


I started off by dicing up the apples.  {I also put a little lemon juice on them as I went.}


Then heated up my skillet with butter and EVOO.

{Maybe I let it get a little too brown.}

While things were heating up, I salted and peppered each of the chops.

Like PW, I picked up some boneless pork chops. 
I also got some that were thinner than I've seen before.
I've never had them this thin, but went for it.  They looked good to me!


When done seasoning them, I put them in the skillet.

Either my skillet is little, or the chops were big...but I had to cook them it 2 shifts.


Flip!


Once the chops are done, I put them on a plate to sit.

Then I dumped in the apples!  And I let it sizzle!  :)

I added in some 2 Buck Chuck {Thanks AMY!},
Apple Cider Vinegar {have NEVER used this for anything other than making Red Velvet Cupcakes...so a new adventure for me}, and let that cook while I stirred.

Once things look good, pour I dumped in some syrup.
There was no measuring involved at this point.  :)

And because it was in my pantry beside the syrup, I decided to add some brown sugar to this mix.
Then I decided to add in a little cinnamon as well.
I have no idea why I did it, but it tasted great!

Now that I think of it, I think it's because the apple cider vinegar was a little strong.
I didn't like it.  I needed to get rid of it.
Brown sugar and cinnamon was the trick!  :)

Finally, once the apples are looking lovely in their 2 Buck Chuck, syrup, brown sugar, cinnamon bath, it was time to put the pork chops in the mix.

Let's just say...my skillet got full!

I turned the heat down a little, and let it simmer for awhile.


When I had enough of having to wait and needed to eat,
I took out one of the chops, a spoonful of the apples and goodness, and enjoyed!


Honestly, I think I had it all gone within 5 minutes.

Seriously.

I pretty much inhaled the meal.  It was DELICIOUS!


For the full recipe, head over to PW's post.
You won't be sorry. 

Well, maybe you will...because then you will have to make it and won't want to wait to eat it.

But it's worth it!  Enjoy!

:)


Related Posts Plugin for WordPress, Blogger...